 Research & Development (R&D) has always been a core focus at COBOD. Today, we’re excited to talk with Jonathan Riise, Head of R&D, who, along with his team, developed the newly launched BOD3 3D Construction Printer. In this interview, Jonathan Riise shares the journey behind the BOD3’s development, what went into creating innovative solutions, his personal favorite feature, and why the BOD3 is ideal for 3D printing homes.
An Interview with Jonathan Riise
Jonathan Riise joined COBOD in early 2021 after completing his doctorate studies and working for several years in the UK within automation and robotics. His hands-on experience with technically challenging projects and collaborating with partners across Europe has perfectly prepared him for COBOD’s international work environment, with employees, customers, and partners all around the world.
The first question for Jonathan was one many are curious about: Why the BOD3? What were the key drivers behind its development?
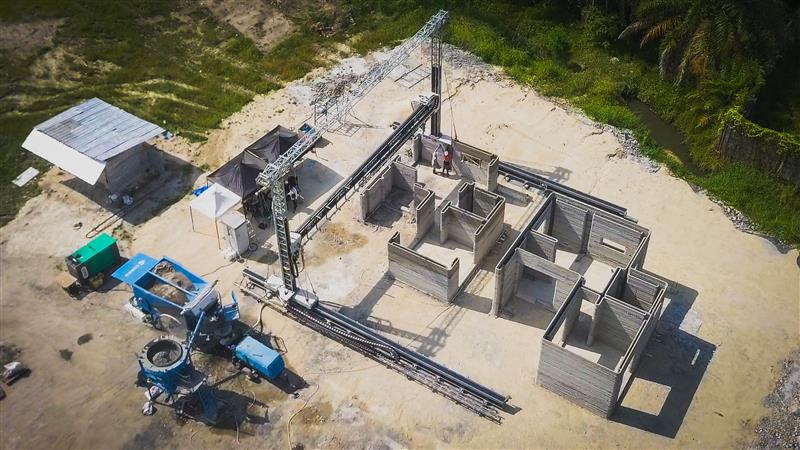
Jonathan: The main drivers were to really try to optimize printing speed and reduce the number of Z columns needed to make it a more mobile printing solution. So, with the BOD2, the design is tried, tested and successful. But, the BOD2 is fixed and great for higher structures, whereas the BOD3 is designed for continuous printing in length (Y-axis). With BOD3 we really tried to develop a product that allows you to build faster in a line. Row houses, for example, are an excellent use case for it. And of course, the idea was that it would also be cheaper to build with the BOD3.
Speed and cost-efficiency are clearly important factors in the construction process for everyone involved, from contractors to future homeowners. Building on that, what sets the BOD3 apart from other construction printers?
Jonathan: I think the fact that it’s natively built for printing with real concrete* and large concrete hoses is a huge benefit. Additionally, the whole idea of leapfrogging, where track modules are moved from behind and placed in front to extend the Y-axis (length) during the printing process of the second structure, eliminates printer downtime between projects. This sets it apart in the market.
*Jonathan refers to COBOD’s open-source material strategy, which allows the use of local material (e.g. sand and gravel) as the main ingredient of a 3D printable concrete material.
Anyone familiar with R&D knows that along with the excitement, there are always technical challenges. What were the most significant challenges in developing the BOD3, and how were they addressed?
Jonathan: I think the biggest challenge we had from the very beginning was how do you lay down tracks? That is essentially what we are doing with the BOD3. We want to have tracks that can go very far but also need to be straight and leveled, but also allow for some flexibility to accommodate a wide range of customer sites. If you think, for example, of railway tracks, these don’t need to be super accurately leveled, and they can go from miles to miles. We wanted to develop something that didn’t need extensive groundwork to be installed. I think that was one of the biggest hurdles we had to overcome.
The second challenge, I think, was that we always knew we wanted to print with real concrete. So, from the very beginning, we had to design the system with DN 75 hoses in mind, so larger, heavy concrete hoses. We had to make sure they could be safely mounted and run within the advanced hose management system of the BOD3, while also building a structure that was strong enough to support the heavy load of the equipment and materials. That was another challenge.
And the way to overcome those challenges was by working with the concept that we already know from our BOD2 printer and first-hand industry experience in the industry. The solution we arrived upon was to use the same trusses that we know are built to very high tolerance and support heavy loads. This gives us the advantage that we are already familiar with the materials, as well as allowing our customers to turn their BOD2 into BOD3 as it is built with the same materials.
It may seem simple now, but a lot of time and effort went into perfecting every detail. After all that hard work, what was the most rewarding moment in the journey of bringing the BOD3 to life?
Jonathan: It was definitely seeing it in full scale for the first time. After months and months of looking at a screen and CAD models and going through production tolerances, seeing it all come together was just incredible. The full-scale of the 3D printer that we built. That was a fantastic experience, and it was also amazing to have the whole team around for it.
You are probably one of the people who know BOD3 the best and has seen every little detail of it. Do you have a personal favorite feature of BOD3?
Jonathan: I really want to emphasize that all the hard work is actually done by the team here. But I think for me, the fact that this was built with the Universal X-Carriage has been a huge improvement. It’s one of the features that I really like, as you can put on different tools without taking the entire X-axis apart, whether it is a casting head or some manipulator that looks like an arm. Who knows what tools COBOD will release in the future.
It is definitely exciting to see what R&D develops next. But let’s maybe quickly revisit the Universal X-Carriage to ensure we understand it correctly. The X-Carriage does not add an extra item to the printhead, it allows for the complete replacement of the printhead, is that correct?
Jonathan: Yes, you replace what is currently there. So, after printing, you maybe want to do some cutting or some milling. It does not make sense for cutting to happen at the same time as printing, as you would, for example, cut into the just printed walls. However, it would make sense to do it as an extra step to prepare for wall sockets. So, it makes sense to replace the printhead with another tool head after the printing, which then also has unrestricted access to the entire print volume. We’ve talked about multifunctional robots, and this is a step in the right direction for us.
Sounds like exciting times are ahead for the 3D construction industry, and the BOD3 is set to play a key role in shaping its future. In your opinion, how do you think the BOD3 will impact construction practices and enhance efficiency?
Jonathan: I think the BOD3 has the advantage that moving it became so much easier. Once you’ve set it up you can expand the tracks, or more precisely leapfrog the existing tracks. There are fewer columns to be set up, so overall it is just a simpler and more efficient process.
The BOD3 will definitely help with low-rise residential construction. From what we’ve seen in research and statistics, there’s a need for low-story buildings, because people are in need for proper homes. Homes that are built to last! The BOD3 is perfect for row houses, attached or semi-detached houses, and villas.
And if you think beyond housing to a printing pre-cast setting in more of a factory environment, you can print in one area and then move over and print in a second one. With this two-stage setup, while one element is curing and being moved out, you can start printing the second one. This means you can keep moving back and forth.
I hadn’t considered that application before, but it is highly effective. It enables continuous printing, ensuring uninterrupted progress—exactly what the BOD3 was designed for.
www.cobod.com


